In Soviet times, films about Indians inspired boys to make onions. We made copies of Indian bows from the branches of coniferous trees, the fir was especially suitable for this - its elastic and flexible branches turned into an excellent means for shooting. The arrows were made from slats or small planks, equipped with tin tips from cans. Today there are materials that are not inferior to wooden bows, and when skillfully made can surpass them. PVC pipes are a great material for this. The author of the model below is lawyer Egorov. His collapsible bow has excellent qualities that he will demonstrate in trials.
The first video shows in great detail the entire process of preparing materials and making a bow.
The second video is devoted to testing in winter conditions, the bow was camouflaged. It has been shown that onions can withstand stress in frost.
Perhaps you recognized the bow made of pvc pipe and noticed that it is no longer white, but camouflage.
This video is about checking a collapsible bow and about the technique of its camouflage. It was written for those who claim that this bow will burst in the cold. So, it has been proven that when cold, onions did not lose their properties. It only remains to emphasize that the test firing of them was conducted at temperatures from + 27 to - 18 degrees and there are no differences in the latter case.
Oxford camouflage fabric was used to work on our task. Without impregnation, it does not affect the elasticity of the bow shoulders. After impregnating the fabric with epoxy resin, the weapon will become composite and the tension of the bowstring will increase. The shoulders of the bow are asymmetrical. Top - 600 mm Bottom - 650 mm Handle - 310 mm (50 mm grooves).
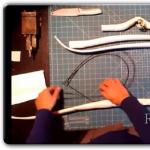
For camouflage, you need to cut off all excess from the fabric. The normal allowance is 20 mm. Next, we use a fabric spray adhesive. For the shoulders of the bow, the author of the idea used 3M glue. Suitable for 77 and 90. For camouflage of a shaped handle and a shelf for an arrow to reinforce the bow with a composite material - micarta, you need to saturate the fabric with polymer. Better yet, glue the fabric directly onto the epoxy. To do this, you need to coat the entire surface of the shoulder with resin and wait for partial polymerization - the effect of scotch tape. Further, as shown in the video.
After the glue is applied, you need to gently straighten the folds, lay the fabric on the camouflage surface and remove the excess. The fabric can be glued end-to-end and overlapped. Even without resin impregnation, the threads will not come out of the hemmed edge. If using aerosol adhesive, you will need to add it as needed.
To protect the table, you can put a sheet of glassine. This will avoid mistakes if you have a crease or crease. They can be removed by stretching the fabric in one place and smoothing it in another.
To begin with, all the excess material was brought into an interference fit into the socket, and then the joint was impregnated with superglue. Now you need to remove all unnecessary with a knife. The fabric covered the saddle of the bowstring, so we had to make cuts above the grooves for the bowstring, and then wash the camouflage fabric in them with the loop of the bowstring. Although the work is primitive - there are only two actions - tension and smoothing, but rather painstaking and, most importantly, regime. The case must be completed before the glue dries. If you started gluing shoulder camouflage, then the work must be completed without interruption.
For a good impregnation of the fabric with superglue, it is necessary to use polyethylene and press the cyanoacrylate deep into the fabric. Thanks to camouflage with fabric, the bow became pleasant to the touch.
Next, you need to go to the camouflage of the shaped handle. The easiest way to do this is to make a winding. It is best to make a mark to leave the movable part of the handle open, but you can wind up an already assembled bow. First you need to cut a tape about an inch wide from the canvas. Next, apply a layer of glue to the handle and start wrapping. And thus, turn by turn, move to the end of the winding zone.
It is important to immediately cut the tape to the desired length. This is easy to do. So that the edge of the tape does not shaggy, it must be laid with maximum interference and more glue should be applied, especially at its ends.
Arrow shelf camouflage is also done with superglue. By gluing the fabric to the inner surface of the half-ring, its diameter decreased, so it was necessary to adjust the diameter of the half-ring to its original size at the end of the work.
Finally the screws need to be screwed in place and the job is done.
Good day to all, dear friends! In today's article, I would like to consider a very interesting homemade idea. This homemade product will not only help to while away leisure, but also suitable for constant entertainment and pastime. In general, today we will consider how you can make a not very difficult, but cool shooting bow from ordinary PVC pipes. But this bow is not quite ordinary, firstly, it has a "magazine" with shells and is in fact semi-automatic, and secondly, this bow does not have an entirely ordinary mechanism for shooting, it is neither blocky nor classic. Rather, something in between.
In general, the homemade product is very interesting, so let's not drag out with a long preface, let's go.


For this homemade product we need:
-pvc pipes of different diameters (mostly 32 mm)
- stationery rubber bands
-bolts
-nuts
-washers (bolts, nuts and washers must be of the same type and match each other)
-plywood
-ork glass, or transparent thin plastic
-strong, but not very thick thread
From the tools we also need:
-marker
-building hair dryer
-mini drill with disc cutting attachments
-ruler
- hanger for metal
And so, the first step is to take a 32 mm PVC pipe, a ruler and a marker. We measure 22 cm with a ruler, make a mark and use a metal hacksaw to cut a piece from the pipe at the mark.
After the workpiece has been cut off, it must be placed on a flat, strong, non-melting and unnecessary surface, the author of the video used a piece of thick plywood. Then we take a building hair dryer and begin to gradually and gently warm up the pipe. After the pipe has softened, you need to take another piece of plywood and press the pipe so that it flattens, but not very much. In general, everything needs to be done as in the photo below:


With the help of a marker, we round off the edges of the workpiece that we made earlier and mark 3 marks for the holes, one mark in the center on one side, and two others on the opposite.
We cut the edges with a mini drill or a small electric grinder (if there are discs for the thread of the required size and type). Then we change the disk to the drill at the drill and drill those three holes, you need to drill through and through and as evenly as possible. In the same way, we make another of the same blank from PVC pipes and two more identical blanks, but shorter and with 4 holes, instead of 3. How you need to make two additional blanks can be seen in the photo below, but it is more clear, the author showed this in the video:


We take a long PVC pipe and use a marker and a ruler to make two marks on it, one by 10 cm, the other by 33 cm. Again we take a hair dryer and heat up the entire pipe, but not very much. After that, we bend the pipe in the places of the marks as shown in the photo below (it is best, of course, for safety reasons, to do this with construction gloves). Then, we drill 4 holes in this workpiece: two from the smallest edge, one in the center and one more from the other edge. By the way, while bending the pipe, the larger edge must be flattened a little.
In total, you need to make two such blanks:


We paint the resulting blanks in different colors, the author decided to cover them with spray paint, orange, blue and black:


We start from the side of the main part of the bow.
On the smallest workpiece, we put the two largest ones, so that the holes coincide with each other. Then we insert the bolts into the holes, but do not fix them with nuts and washers yet.
At the ends of the long workpieces, place the middle workpieces and fix them with nuts and bolts. Then, on the very edge of the long blanks, we install the bolts and screw them a little with nuts, so that you can put on stationery rubber bands on them, which is what we actually do in the next step. We put on several stationery elastic bands at once on the edge of a length and an average workpiece. By the way, the middle workpiece should move freely along its axis. In general, we do everything as shown in the photo below:


On a piece of plywood, using a ruler and a pencil, we make a drawing. The dimensions and shape of the drawing can be seen in the photo below. Using an electric jigsaw, we cut out this workpiece and repaint it in a different color, you can do this with a marker, but not any marker will be able to paint the plywood with high quality:
Now it is necessary to make a mechanism with the supply of shells from the "magazine" to the "barrel" of the bow and the "magazine" itself for the shells. There is nothing complicated here, you just need to do everything as shown in the photo below and precisely adjust the size of the shells and the hole for them:


We install the resulting mechanism to the general structure and fix it with bolts and nuts, everything should be smooth and neat. Well, on top, finally, we close the remaining smallest PVC pipe blank:
For a not very thick PVC pipe, we make an even cut at an angle, and on the opposite side we drill an even through hole. This tube should fit freely into the tube of the projectile feed mechanism, but it should not be very thin. This blank will push projectiles from the "barrel" of the bow.
We test what happened:


We put how many shells in the "magazine" and begin to move the tube, which was installed in the mechanism, forward and backward. If from the "store" shells begin to feed into the "barrel" and fly out of it when the pipe returns to its original position, then everything is done correctly and you can continue:
We take the thread, pass it through the through hole in the tube and tie the ends to the edges of the middle blanks. In general, we do everything like this, everything is shown in the photo below.
There are a lot of ways to create such a thing as onions from PVC pipes; on the Internet you can find the most sophisticated ways, but first of all, I want the manufacturing process to be simple, convenient and not troublesome, including not taking much time and effort. These are the methods that are worth getting to know. Consider the three simplest and most understandable ways to make a bow yourself.
Method number 1.
Using the first method, it is quite possible to make an interesting bow, the design of which cannot be disassembled. Compared to the many tips and concepts for the manufacturing process, this is perhaps the easiest option. The main nuance in the creation of a bow is the availability of construction equipment, such as a technical hair dryer.
For the manufacturing process, you need to arm yourself:
1. A pipe made of polyvinyl chloride, having a length of about one and a half meters, and a diameter of about 2.5 cm.
2. Technical device hair dryer.
3. Narrow hand saw, felt-tip pen and measuring tape.
4. One long piece of wood and two pieces about 80 cm long.
5. Instrument for the drilling process with a metal rod and aluminum paper (see).
6. Coloring agent for decorative properties.
7. Scotch tape and gloves of any kind.
So, at the initial stage of making the onion, it is necessary to mark the PVC pipe. With the help of a measuring tape, it is necessary to measure a section with a length of 30 cm and 60 cm from two ends of the pipe, followed by a marking. For these purposes, for the convenience of the process, you need to use a bright-colored felt-tip pen. Further, it is necessary to determine the center point of the pipe with maximum accuracy, for this you need to measure 75 cm from either end of the pipe. Fix the mark with a felt-tip pen. Then, to determine the area that will be diverted under the handle, you need to measure 8 cm in both opposite directions from the central point. Naturally, fix the marks with a felt-tip pen.
The next stage in the manufacture of onions involves the creation of deformation of the PVC pipe. For this, for the sake of convenience, it is necessary to create an auxiliary element that will help warm up the pipe. A piece of aluminum paper must be bent so that two perpendicular planes are formed. Simply put, create a 90 degree angle formation.
Further, the very process of deformation and bending occurs. To achieve what you need, you need to take a PVC pipe and close one end of it with a corner foil element. Showing attentiveness and accuracy, focusing on the marking of the pipe, you need to heat the section of the pipe, which is located at a fixed point of 30 cm.Using a technical hairdryer in this matter, the heating process will pass quickly and without problems. It must be taken into account that in order to obtain a good result, it is necessary to try to heat the entire intended section of the pipe with uniform movements. When heating, you need to turn the pipe.
 Non-collapsible PVC Pipe Bow - Step 4
 After you visually see that the pipe section has become soft, to ensure that it does not lose the desired temperature and simply does not cool down, you need to wrap it in aluminum paper. Wasting no time to prevent cooling, you need to do all the same steps with the other end of the pipe. If it becomes visually noticeable and sensitive to the touch that the first heated section of the pipe has begun to cool down, it is imperative to heat it additionally, resorting to the help of the same technical hair dryer.
It is very important to understand that in the process of heating a PVC pipe, you must try to prevent the pipe surface from becoming covered with bubbles, black bloom or losing its color. Otherwise, this will indicate that the heating process has occurred too quickly and unevenly.
After dividing the end part of the pipe into equal parts, followed by marking with a felt-tip pen, it is necessary to draw a line from the center point of the pipe to one of the edges of the deformed end. Correct slope is considered to be the position inside the bow from the bottom up.
Having departed from each of the ends of the pipe a distance of 3 cm, you need to fix it with a marker and draw the rounding of the ends of the future bow. According to the drawn rounded line, you need to cut off all unnecessary. By analogy with the process with the second end of the pipe, do the same. 
To hide ugly cuts using a technical hair dryer, you need to warm them up and, after they become elastic enough, bend the edges of the pipe into the inside of the future bow. The other end must be handled in the same way. Alternatively, the cuts and their edges can be refined with abrasive paper.
In order for the transition section between the deformed edges and the base of the bow to be smoother, it is necessary to warm up the transition section slowly enough, focusing on the 30 cm mark and about 4 cm on both sides. In the process of heating the pipe, it should gradually expand and the transition section will become smooth by itself. This time can be used (while the area is warmed up) to create a bend at the ends of the product. With respect to the base of the bow, the curves should protrude forward. In the same way, it is necessary to create a bend at the second end of the pipe. As a result, at the end of this stage, you should get an even pipe with the endings bent forward.
Next, you need to warm up the pipe section from the 30 cm mark to the starting line of the handle. After the procedure, you need to bend to the inside of the onion and let it cool. Repeat the procedure on the opposite side. As a result, the features of the future bow should begin to be seen.
And at the final stage, it is necessary to bend the handle. This process is necessary for the convenience of using the bow. According to the already familiar principle, it is necessary to warm up the area allocated for the handle with a technical hairdryer and clamp it between the legs, creating an ellipse for it. The tapered portions of the ellipse should be perpendicular to the person holding the bow. At the same time, you need to raise the opposite parts of the bow, while having achieved a change in the position of the handle, it should bend into the inner plane of the bow.
We complete the production of onions with the process of creating places for a tight stretch of nylon thread or twine. Having retreated from each end of the bow about 2 mm and from the front part about 1 cm, in the marked mark it is necessary to make the corresponding holes with a drill. The holes should be about 5 mm in diameter. After that, with a special saw, it is necessary to cut a groove at an angle, located from the edge of the bow to the drilled hole. Naturally, at the other end of the bow it is necessary to repeat the process.
To give the onion a beautiful appearance, using dyes, you need to apply a layer of them to the surface of the onion, thereby decorating it. You need to choose the color according to your desires. If you slightly sand the surface of the onion with a sandpaper before applying the paint, you can ensure the ease and quality of applying the coloring texture. With tape or another, you need to wrap the ends of the bow (focusing on the 30 cm mark) and the section under the arm.
Now you can use your hand-made product.
Method number 2.
As already became clear, this place will be intended for the handle. We must not forget that all sizes are approximate, if the palm is much larger, then the markings should be carried out, taking into account the size of the person's palm. Otherwise, it will be simply uncomfortable to hold the bow.
With construction equipment, heat one side of the pipe from the starting line of the handle to the very end. After the PVC pipe has become softened and flexible, you need to lay it in a pre-created structure of boards.
In the case of using a polypropylene pipe, the boards will not help create a clamp and deform it. In this case, in addition to the boards, you need to use more rigid and durable materials and devices, for example, iron corners and a tool with which you can clamp the pipe. After clamping one part of the pipe, it is necessary to bend it. All these actions must be done with the second part of the future bow. 
Next, you need to start forming the handle. Protecting your hands with gloves or any rag, after warming up the desired part, you need to create a comfortable place in which to hold the bow. In the case of using polypropylene pipes, to create the handle, it is necessary to repeat the steps using more rigid tools. You need to try not to overdo it, flatten quite a bit. 
Then it is necessary to measure a section 15 cm long from each end of the pipe.Using any tin can, you need to put one end with a measured point on it so that the point defining a segment of 15 cm is located strictly in its center. From this point on, you can start working with a technical hairdryer, bringing the pipe to flexibility. Having brought to the desired state, the softened segment must be twisted around the circumference of the container. 
It is important to note that you need to be careful and not overdo it. In case of severe overheating of a polyvinyl chloride product, it will begin to change color, turn yellow and lose its quality properties. If you overheat a polypropylene pipe, it simply spreads out.
When constructing a fastener for a tension thread, you need to cut double-sided grooves at the ends, while controlling the depth. Do not make them pass-through. The same rope made of polypropylene and nylon is suitable as a bowstring. Alternatively, you can try cotton. If any other rope is available that does not have the ability to stretch, you can use it without hesitation. 
Prefabricated wooden narrow slats are available for making bow arrows. To support the arrow, it is recommended to use a natural feather, when fired it does not injure the hand. The length of the slats must be chosen so that when the product is pulled, it is enough. To prevent the arrows from sliding along the thread, you need to cut grooves at their ends. To ensure good penetration into objects, the opposite ends of the arrows must be well sharpened and veiled with hard material. Now you can enjoy it.
All three methods of making onions from PVC pipes have been considered, and the choice of the simplest and most convenient is only yours.
Why do you need a homemade pipe bow? The question is, of course, an interesting one. In the modern world, such a tool is more of a "sport" fun than a real necessity. After all, a hunter lives in every man, so this occupation, although it has turned into a hobby, has not lost its relevance. Bow hunting is unlikely to be effective, but as entertainment in a safe area, the tool is quite suitable.
In addition, you can make a bow from a PVC pipe with your own hands for a child. A teenage boy will definitely appreciate such a device. But here it is important to remember about safety, especially when making arrows.
As it turned out, you can make a wonderful functional bow from PVC pipe. To do this, it is enough to consider visual examples, choose the right pipe diameter and related materials. And the very manufacture of onions from PVC pipes is a fairly simple task that requires only attention. In order to better describe how to make a bow from a pipe, we will break the whole complex of actions into several steps.
Material selection
One PVC pipe will be used for all components of the structure. Its diameter is no more than 5-10 mm. It will be split into several pieces. The pipe walls will have an optimum thickness of 2 mm. In this case, after assembly, the bow will turn out to be very light.
The structure will consist of 3 parts and 5 pieces of pipe. The classic bow consists of:
- handles;
- bowstrings;
- shoulder.

A do-it-yourself bow from a pipe in the video will allow you to visually have an idea of each step of the work. It is better to start manufacturing separately for each element. By the way, for convenience, you can also use a homemade drawing, but if you do not have drawing skills, you can do with simpler work. Although video or photo material will not be superfluous to view.
Making the shoulder
For the shoulder to be reinforced, it is advisable to use a PVC cable with a channel 66 cm long. Using special gloves, you need to heat the pipe well using an industrial hair dryer. If this is not the case, it is advisable to find an alternative heating device, but without an open flame, so as not to damage the pipe. It is imperative to use gloves or potholders, as the pipes heat up quite strongly and quickly when heated.

As soon as the pipes have become plastic, a cable is inserted into them and then the product heats up again. A piece of board, laminate, wooden bar is suitable for crimping. It is important to press well both shoulders of the bow.
The excess parts are cut off with a grinder, after which the resulting burrs are trimmed with a file.
The layers on the toes of the shoulders are glued and connected. A hole is drilled in the sock. This is necessary to insert and crimp the metal eyelet. They are made from copper or brass tube. First, they are inserted into the hole of the ring, then flared along the edges. For the convenience of the drum, it is better to use the caps of the self-tapping screws. Both shoulders of the future bow are subjected to this procedure.
Handle
She is one of the important elements. The better it is, the more convenient it will be to use the bow. So, the handle must have sufficient rigidity. To begin with, we make one part - a form. It is turned from wood, after which a molten piece of pipe is driven into it and molded according to the required parameters.

If suddenly the tube has cooled down, and the handle is not yet ready, you need to heat it up again. After the two parts, the arm and the handle, are heated together and inserted into each other.
Boom shelf
To do this, you will need toothbrushes (3 pcs.) And a piece of PVC pipe. For this, the pipe part is formed in the form of the letter G or T. The upper part of the part is made under heating in the form of a half-ring. The lower part is attached to the handle cavity with simple fasteners.

To make a slot for arrows, the product is put on a tube with a large diameter, and the second part is connected to the handle and smoothed to its shape. In this case, one hand holds the half-ring from opening, as well as displacement, and the other presses the handle against it.

The head of the toothbrush is wrapped with tape in several layers. This is to prevent damage from heating. After that, in the place where the brush head passes to the leg, we bend it. All parts are connected with small screws.
Bowstring
First, a bow-sized reel is made, after which the fishing line is wound. The two ends of the product are connected to form a single closed ring, after which the entire bowstring is wound along with the loops.
Decor
After the bow is ready, you can decorate it. For example, paint in a khaki color or in a single tone. Thanks to the whiteness of the PVC pipe, the color will be rich and beautiful. It is better to use acrylic paints. Also, for better operation, the bow body can be treated with polymer impregnation.

As for the arrows, they can be made from either aluminum or wood. Their shape and degree of pungency should be chosen based on future use. If the bow is planned for a child, it is best to take safe suction cups.
The result is a beautiful functional product that will delight "hunters" of any age.
Hello everyone, I am glad to welcome you to this site. Today I will tell you how to make a bow from a PVC pipe with your own hands. Of course, the idea on the Internet is not new, but I simply would not forgive myself without making such a bow with my own hands.
To make homemade onions from PVC pipes, we need:
- PVC pipe marked SCH 40;
- Building hair dryer;
- Roll of cardboard;
- Several carpentry clamps;
- Two equal planks (with which we will squeeze the heated pipe)
Sizes of Homemade PVC Pipe Onions

Making onions from PVC pipes with your own hands

1 ... We mark our workpiece. The length of the pipe is 120 cm, 20 cm is left for the handle in the center and 12 cm. From each edge to the pasture of the shoulder.
2 ... Using the cardboard as a heat shield, we evenly heat the part we need. Exactly, carefully, otherwise the pipe will turn yellow, melt and lose the elasticity we need, so we don't stay in one place for a long time.

3 ... When the pipe is plastic enough, we press it down with strips and leave it for 7-10 minutes. Briefly about the device for compression, in the present case it is just two pieces of chipboard. You can find something else if it was even. The bolts are part of the old design, they were used when there were no clamps yet now they are no longer needed, they just were not removed.

4. With the help of these bolts and nuts, we adjust the thickness of the compression of the workpiece, without them the arms were of different lengths and, accordingly, had different elasticity and looked metric.

5 ... In 10 minutes. We remove the fasteners and check the result of the work. We should get the following.

6 ... We also repeat this procedure for the other shoulder and get a symmetrical workpiece.

7 ... Shape the end of the shoulder. We reheat and press down we need a segment perpendicular to the previous compressions.

8 ... This shape of the shoulder will not completely suit us, so we will fix everything manually by reheating the joint and until the shoulder has cooled down separately we give it a rounded look using a round object.

9 ... We repeat the same procedure for the handle. With a few finishing touches left, the PVC bow construction is complete.

10 ... Sharpens the excess. We make recesses for the bowstring.

11 ... For the bowstring, you can use a regular rigid polypropylene cord.