Plastic pipes are a good material for onions. It does not corrode, does not rot, is easy to process, and when heated, it becomes plastic. All of this can be used to make homemade collapsible bows.
The material used is regular PVC pipes from a hardware store. Such a collapsible bow fits completely into a quiver with arrows, and is assembled and disassembled in a matter of seconds.
How to make a bow from PVC pipe
The basis of the onion are pieces of plumbing PVC pipes, with walls of two millimeters. The smallest thickness of the shoulder of the bow at the edges in the compressed state is six millimeters. At the same time, unlike purchased bows, this bow is very light, which is not unimportant for the survivalist.
Homemade PVC bow design overview

A homemade plastic pipe bow consists of three parts. The central part is the handle, bowstring and bow shoulders, reinforced with an inner insert.

For the manufacture, in addition to scraps of PVC pipes, you also need a construction hot air gun. It is necessary to thoroughly heat the plastic pipes with a construction hairdryer and shape them by giving them a shape. Do not forget to wear special gloves, as PVC pipes become hot when heated.

Prepare in advance a piece of laminate and a clamp. Cover the heated tube with laminate and press it with a clamp. In order for the parts to cool down more slowly, the laminate must also be preheated. It turned out here is such a shoulder blank for a homemade plastic bow. Similar actions must be done with the second shoulder. The shoulder sags more where it is narrower, so heat the very tip of the shoulder even more and squeeze through a block of wood.
You can give the desired shape to the toe of the shoulder by cutting off the excess with a grinder or an ordinary metal file. Then the edges of the cut are processed with a file.

The layers in the shoulder socks need to be glued and connected by riveting with an eyelet. To do this, drill a hole in the toe of the shoulder with a drill. The hole diameter must match the diameter of the eyelet. We use a 6mm piece of copper or brass tube as the eyelet. We insert a tube into the hole and flare the ends. Self-tapping caps can be used for flaring. Now we carry out the same procedure with the second shoulder.

Naturally, a homemade collapsible bow cannot be without a handle. Heated PVC pipe can be easily cut with a knife. We need a rigid shaped handle. The curvature of the shaft is needed so that the shelf for the arrow is pine of the plane of movement of the bowstring, and when firing, the shaft does not deflect the arrow. This makes aiming easier and improves shooting accuracy. In this case, the handle should be rigid and not twist. We heat a piece of prepared PVC pipe with a construction hairdryer. And we drive into the handle, a shape previously carved from wood, according to which the handle is molded.
To facilitate the corral of the insert in the middle of the pipe, a dowel and hammer can be used to expand the inner diameter of the pipe. If the tube has cooled down during operation and has lost its plasticity, it must be reheated. And so to heat the required number of times. In order to connect the shoulder and the handle, it is necessary to heat the handle, squeeze the bell of its tube with your hands and push it inside the bell of the shoulder. With further heating together, the shoulder and handle will fit perfectly together. And it's even good that they were originally the same diameter.
Making an arrow shelf

To make an arrow shelf, you need a piece of pipe and three toothbrushes. To begin with, you need to cut a blank in the form of a letter T or G from a pipe cut of at least ten centimeters. The upper part of this letter will be a half-ring of the shelf, into the slot of which the arrow is inserted. And the lower part, with the leg, is fastened to the handle cavity.
In order for a slot to form, into which arrows will be inserted in the future, the workpiece must be put on a tube of a larger diameter. And in order to shape the leg of the shelf, you will need to connect the second part with the handle, and smooth the leg with your hands in its shape. You will have to act with both hands. With one hand, hold the half-ring from displacement and opening, and with the other, press the handle against the half-ring, while simultaneously tightening the handle leg, giving it the shape of the same handle.
It came down to toothbrushes. In order not to damage the bristles when heated, you just need to wrap it with tape. Now, using a turbo lighter, we heat the brush, wait for melting, and, resting on a flat surface, bend it. We get a semicircle as a result.
Now you need to separate all unnecessary and one of the three parts with bristles is ready. The bristles are held in the holes by aluminum clips. It remains to connect the finished parts with small screws.
Making a bowstring for a plastic bow

In order to make a bowstring, you need to wind a fishing line on a large reel, the size of a future bow. Tie the two ends and you get one closed ring, folded several times. Then, we make a bowstring winding for the loops and for the entire bowstring.
If you still have any unclear points, watch the video Making bows from a plastic pipe.
Video of making a bow from a plastic pipe
By the way, you should not be afraid that the bow will not work in winter or break, see the winter tests of the bow, as well as how to apply camouflage on a homemade bow made of PVC pipes.
Overview of plastic pipe bow designs
I must say - making bows from PVC pipes is a very common hobby! A plastic bow with a synthetic or steel bowstring is not afraid of rain, you can shoot in any weather, so people make all kinds of designs.

Here is the simplest one-pipe bow, the shape of the bow is classic.

This design uses a wood handle and only the shoulders are made of plastic pipes.

A couple more simple bows with different shapes.

The shape is quite curved here, but the shoulders of the homemade bow are not flattened.

And here, at the ends of the plastic pipes, pieces of wood are inserted, on which the bowstring is put on.

If a single pipe seems to you a little, then to increase the tension force, you can put additional pipes, the edges are connected to each other with the same bowstring.

Well, especially strong ones can build a real monster for themselves from the same plastic pipes.
As you can see, it all depends only on your preferences and desires!
This article is about how to make a bow from PVC pipe (arrows will be wooden).

ATTENTION! BE CAREFUL WHEN SHOOTING AN ARCHER, IT CAN BE VERY DANGEROUS! DO NOT POINT THE BOW AT PEOPLE AND ANIMALS - THE ARCHER SHOT MAY BE PAINFUL!
DIY materials and tools for assembling PVC pipe bows:
- PVC pipe with a diameter of 20 mm (outer diameter) and a length of 150-200 mm.
- Two thin PVC tubes 0.6-1.0 meters long to be inserted into the above-mentioned pipe section.
- Pencil, pen, saw or scissors for cutting PVC.
- Rope or cord for making a bowstring.
- Round wooden lath, about 0.6 meters long.
- Multi-colored tape (you need 3 colors for the feathering of the arrow, and several for the target).
- Double pencil sharpener (we will sharpen arrows in a large hole for crayons).
Step 1: Prepare the pipes


It is better to choose a reinforced PVC pipe (aluminum or fiberglass). Although unreinforced can also be used. We use the 20 mm short as a connector for two thin PVCs.
Step 2: making serifs for the bowstring


Make two small notches at either end of the bow (or at one end of the upper and lower arms of the bow if making a split bow with two tubes). To do this, use a saw to make V-notches about 1/2 of the thickness. Serifs are needed to attach the bowstring.
Step 3: pull the string


Next, cut a piece of rope 150-200 mm longer than the upper and lower arms of the bow that are put together. Then tie a rope around the ends; the knot must be very strong so that the string does not slide down the pipe.
Take one of the tubes and insert the end opposite to where the rope is tied into the short, thick tube, about halfway down. Insert the second thin one on the other side of the thick segment. Both should bend under the tension of the string, which should not slip out of the serifs.
Step 4: making the arrow


First, make an arrow shaft out of a wooden batten. Saw off the rod to the required length. Next, using a saw, make a groove (bowstring cutout) from the back end of the boom, about 25mm deep. Wrap tape around the groove to prevent the arrow from splitting. Using a crayon sharpener, sharpen the other side of the arrow until it is sharp enough.
Step 5: feathering

Now you need to make the feathering at the rear end of the boom. Make feathers from colored tape or other similar material. First, make three small rectangles of different colored duct tape. Then cut the feathers of the desired shape from the rectangles.
Make sure the shape and size of all three feathers are the same, this is very important. Now glue them to the rod, about 6-12 mm from the edge of the tape wound on the boom (which you wrapped to prevent the boom from splitting).
Step 6: done!

Your bow is now ready! You can use it for its intended purpose, just do not shoot people and other animals! Suppose you are right-handed, then hold the bow with your left hand by the middle, connecting tube, take the arrow with your right hand, put it on the protrusion of the tube. Insert the middle of the string into the groove on the arrow. Stand with your left shoulder toward the target and turn your head to face the target. Now pull the string as far back as possible, aiming the arrow at the target. Let go of the bowstring. It will take you some practice to learn how to shoot, but in the end, you will master such a less tricky weapon. Have a good hunting!
Hello everyone, I am glad to welcome you to this site. Today I will tell you how to make a bow from a PVC pipe with your own hands. Of course, the idea on the Internet is not new, but I simply would not forgive myself without making such a bow with my own hands.
To make homemade onions from PVC pipes, we need:
- PVC pipe with SCH 40 marking;
- Building hair dryer;
- Roll of cardboard;
- Several carpentry clamps;
- Two equal planks (with which we will squeeze the heated pipe)
Sizes of Homemade PVC Pipe Onions

Making onions from PVC pipes with your own hands

1 ... We mark our workpiece. The length of the pipe is 120 cm, 20 cm is left for the handle in the center and 12 cm. From each edge to the pasture of the shoulder.
2 ... Using the cardboard as a heat shield, we evenly heat the part we need. Exactly, carefully, otherwise the pipe will turn yellow, melt and lose the elasticity we need, so we don't stay in one place for a long time.

3 ... When the pipe is plastic enough, we press it down with strips and leave it for 7-10 minutes. Briefly about the device for compression, in the present case it is just two pieces of chipboard. You can find something else if it was even. The bolts are part of the old design, they were used when there were no clamps yet now they are no longer needed, they just were not removed.

4. With the help of these bolts and nuts, we adjust the thickness of the compression of the workpiece, without them the arms were of different lengths and, accordingly, had different elasticity and looked metric.

5 ... In 10 minutes. We remove the fasteners and check the result of the work. We should get the following.

6 ... We also repeat this procedure for the other shoulder and get a symmetrical workpiece.

7 ... Shape the end of the shoulder. We reheat and press down we need a segment perpendicular to the previous compressions.

8 ... This shape of the shoulder will not completely suit us, so we will correct everything manually by reheating the joint and until the shoulder has cooled down separately we give it a rounded look using a round object.

9 ... We repeat the same procedure for the handle. With a few finishing touches left, the PVC bow construction is complete.

10 ... Sharpens the excess. We make recesses for the bowstring.

11 ... For the bowstring, you can use a regular rigid polypropylene cord.
Why do you need a homemade pipe bow? The question is, of course, an interesting one. In the modern world, such a tool is more of a "sport" fun than a real necessity. After all, a hunter lives in every man, so this activity, although it has turned into a hobby, has not lost its relevance. Bow hunting is unlikely to be effective, but as entertainment in a safe area, the tool is quite suitable.
In addition, you can make a bow from a PVC pipe with your own hands for a child. A teenage boy will definitely appreciate such a device. But here it is important to remember about safety, especially when making arrows.
As it turned out, you can make a wonderful functional bow from PVC pipe. To do this, it is enough to consider visual examples, choose the right pipe diameter and related materials. And the very manufacture of onions from PVC pipes is a fairly simple task that requires only attention. In order to better describe how to make a bow from a pipe, we will break the whole complex of actions into several steps.
Material selection
One PVC pipe will be used for all components of the structure. Its diameter is no more than 5-10 mm. It will be split into several pieces. The pipe walls will have an optimum thickness of 2 mm. Moreover, after assembly, the bow will turn out to be very light.
The structure will consist of 3 parts and 5 pieces of pipe. The classic bow consists of:
- handles;
- bowstrings;
- shoulder.

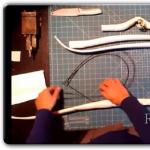
A do-it-yourself bow from a pipe in the video will allow you to visually have an idea of each step of the work. It is better to start manufacturing separately for each element. By the way, for convenience, you can also use a homemade drawing, but if you do not have drawing skills, you can do with simpler work. Although it will not be superfluous to view video or photo material.
Making the shoulder
For the shoulder to be reinforced, it is advisable to use a PVC cable with a channel 66 cm long. Using special gloves, you need to heat the pipe well using an industrial hair dryer. If this is not the case, it is advisable to find an alternative heating device, but without an open flame, so as not to damage the pipe. It is imperative to use gloves or potholders, as the pipes heat up quite strongly and quickly when heated.

As soon as the pipes have become plastic, a cable is inserted into them and then the product heats up again. A piece of board, laminate, wooden bar is suitable for crimping. It is important to press well both shoulders of the bow.
The excess parts are cut off with a grinder, after which the resulting burrs are trimmed with a file.
Layers on the toes of the shoulders are glued and connected. A hole is drilled in the sock. This is necessary to insert and crimp the metal eyelet. They are made from copper or brass tube. First, they are inserted into the hole of the ring, then flared along the edges. For the convenience of the drum, it is better to use the caps of the self-tapping screws. Both shoulders of the future bow are subjected to this procedure.
Handle
She is one of the important elements. The better it is, the more convenient it will be to use the bow. So, the handle must have sufficient rigidity. To begin with, we make one part - a form. It is turned from wood, after which a molten piece of pipe is driven into it and molded according to the required parameters.

If suddenly the tube has cooled down, and the handle is not yet ready, you need to heat it up again. After the two parts, the arm and the handle, are heated together and inserted into each other.
Boom shelf
To do this, you will need toothbrushes (3 pcs.) And a piece of PVC pipe. For this, the pipe part is formed in the form of the letter G or T. The upper part of the part is made under heating in the form of a half-ring. The lower part is attached to the handle cavity with simple fasteners.

To make a slot for arrows, the product is put on a tube with a large diameter, and the second part is connected to the handle and smoothed into its shape. In this case, one hand holds the half-ring from opening, as well as displacement, and the other presses the handle against it.

The head of the toothbrush is wrapped with tape in several layers. This is to prevent damage from heating. After that, in the place where the brush head passes to the leg, we bend it. All parts are connected with small screws.
Bowstring
First, a bow-sized reel is made, after which a fishing line is wound. The two ends of the product are connected to form a single closed ring, after which the entire bowstring is wound along with the loops.
Decor
After the bow is ready, you can decorate it. For example, paint in a khaki color or in a single tone. Thanks to the whiteness of the PVC pipe, the color will be rich and beautiful. It is better to use acrylic paints. Also, for better operation, the bow body can be treated with polymer impregnation.

As for arrows, they can be made from either aluminum or wood. Their shape and degree of pungency must be chosen based on future use. If the bow is planned for a child, it is best to take safe suction cups.
The result is a beautiful functional product that will delight "hunters" of any age.
Good day to all, dear friends! In today's article, I would like to consider a very interesting homemade idea. This homemade product will not only help to while away leisure, but also suitable for constant entertainment and pastime. In general, today we will consider how you can make a not very difficult, but cool shooting bow from ordinary PVC pipes. But this bow is not quite ordinary, firstly, it has a "magazine" with shells and is in fact semi-automatic, and secondly, this bow does not have an entirely ordinary mechanism for shooting, it is neither blocky nor classic. Rather, something in between.
In general, the homemade product is very interesting, so let's not drag out with a long preface, let's go.


For this homemade product we need:
-pvc pipes of different diameters (mostly 32 mm)
- stationery rubber bands
-bolts
-nuts
-washers (bolts, nuts and washers must be of the same type and fit each other)
-plywood
-ork glass, or transparent thin plastic
-strong, but not very thick thread
From the tools we also need:
-marker
-building hair dryer
-mini drill with disc cutting attachments
-ruler
- hanger for metal
And so, the first step is to take a 32 mm PVC pipe, a ruler and a marker. We measure 22 cm with a ruler, make a mark and use a metal hacksaw to cut a piece from the pipe at the mark.
After the workpiece has been cut off, it must be placed on a flat, strong, non-melting and unnecessary surface, the author of the video used a piece of thick plywood. Then we take a building hair dryer and begin to gradually and gently warm up the pipe. After the pipe has softened, you need to take another piece of plywood and press the pipe so that it flattens, but not very much. In general, everything needs to be done as in the photo below:


With the help of a marker, we round off the edges of the workpiece that we made earlier and mark 3 marks for the holes, one mark in the center on one side, and two others on the opposite.
We cut the edges with a mini drill or a small electric grinder (if there are discs for the thread of the required size and type). Then we change the disc to the drill at the drill and drill those three holes, you need to drill through and through and as evenly as possible. In the same way, we make another of the same blank from PVC pipes and two more identical blanks, but shorter and with 4 holes, instead of 3. How you need to make two additional blanks can be seen in the photo below, but it is more clear, the author showed this in the video:


We take a long PVC pipe and use a marker and a ruler to make two marks on it, one by 10 cm, the other by 33 cm. Again we take a building hair dryer and heat up the entire pipe, but not very much. After that, we bend the pipe in the places of the marks as shown in the photo below (it is best, of course, for safety reasons, to do this with construction gloves). Then, we drill 4 holes in this workpiece: two from the smallest edge, one in the center and one more from the other edge. By the way, while bending the pipe, the larger edge must be flattened a little.
In total, you need to make two such blanks:


We paint the resulting blanks in different colors, the author decided to cover them with spray paint, orange, blue and black:


We start from the side of the main part of the bow.
On the smallest workpiece, put the two largest ones, so that the holes coincide with each other. Then we insert the bolts into the holes, but do not fix them with nuts and washers yet.
At the ends of the long workpieces, place the middle workpieces and fix them with nuts and bolts. Then, on the very edge of the long blanks, we install the bolts and screw them a little with nuts, so that you can put on stationery rubber bands on them, which is what we actually do in the next step. We put on several stationery elastic bands at once on the edge of a length and an average workpiece. By the way, the middle workpiece should move freely along its axis. In general, we do everything as shown in the photo below:


On a piece of plywood, using a ruler and a pencil, we make a drawing. The dimensions and shape of the drawing can be seen in the photo below. Using an electric jigsaw, we cut out this workpiece and repaint it in a different color, you can do this with a marker, but not any marker will be able to paint the plywood with high quality:
Now it is necessary to make a mechanism with the supply of shells from the "magazine" to the "barrel" of the bow and the "magazine" itself for the shells. There is nothing complicated here, you just need to do everything as shown in the photo below and precisely adjust the size of the shells and the hole for them:


We install the resulting mechanism to the overall structure and fix it with bolts and nuts, everything should be smooth and neat. Well, on top, finally, we close the remaining smallest PVC pipe blank:
For a not very thick PVC pipe, we make an even cut at an angle, and on the opposite side we drill an even through hole. This tube should fit freely into the tube of the projectile feed mechanism, but it should not be very thin. This blank will push projectiles from the "barrel" of the bow.
We test what happened:


We put how many shells in the "magazine" and begin to move the tube, which was installed in the mechanism, forward and backward. If shells start feeding into the "barrel" from the "store" and fly out of it when the pipe returns to its original position, then everything is done correctly and you can continue:
We take the thread, pass it through the through hole in the tube and tie the ends to the edges of the middle blanks. In general, we do everything like this, everything is shown in the photo below.